Overview
The Mini-MOOC assignment is your opportunity to give back to the world of open learning that has been so generous to you.
In Weeks 3 and 4 you will kick around ideas for a MOOC topic and post them to a discussion. You are free to work on your own, or to partner up with someone who’s interested in a topic that’s similar to yours.
We encourage you to select a topic that you care about, personally or professionally. The Master of Education program’s learning outcomes and competencies are a great place to start. For example, you could develop a MOOC on Creative Problem Solving, Systems Thinking, or Effective Communication. The best way to learn something is to teach it, so consider this to be an opportunity to dive into a topic that you’re passionate about.
Perhaps you have an idea for a topic that’s more specific to your program concentration, such as supporting international students, strategies for motivating learners, or accessibility in online learning.
Or perhaps you have a unique talent or specialized knowledge, such as a hobby or skill, that you would like to create a course about. The choice is yours.
Materials to Download
Process
Criteria for Excellence
- Defined scope and purpose, increasing the learner’s proficiency in the topic content and skills
- Outcomes are clearly articulated so that the learners know what they will gain from the experience
- Learners interact in a variety of engaging ways (questioning, practicing, creating, reflecting)
- Learners are guided through an integrated, connected, purposeful experience grounded in learning goals (not just a collection of readings and activities)
- Learning experience workload is no more than 4-5 hours in each of the two weeks.
- Content includes at least three forms of high quality open learning resources (e.g. materials, videos, tools). OER content meets or exceeds the COOL Collection rubric criteria for quality.
- Content includes at least two forms of substantive open learning resources created by you. Original content is assigned a Creative Commons license
- Makes effective use of multimedia that combines images, words, and sound.
NOTE: This will be a “real” MOOC, meaning that it needs to be open for view by the public. Please keep this in mind when you select your topic and design the MOOC. Anybody should be able to access it over the web.
Starting in Week 4 you will use the MOOC Planner to clarify the goals, scope, and sequence of work in your MOOC (click the link above to download the planner. This will help you translate your big idea into a manageable learning experience that a person could complete within two weeks (modules/sessions).
To see an example of a competed planner, take a look at the Planner Exemplar above that outlines the first two sessions in this Open Learning course.You will also seek out MOOCs created by others to get ideas for how you do (or don’t) want to structure your MOOC.
In Week 4 you will also put your connected learning skills into use as you search the web for Open Education Resources, networks, ideas for learning exercises, and images/videos that are relevant to your topic. You will evaluate the quality of these resources and make strategic selections to “curate” the content of your course. You will also keep a careful record of the links and Creative Commons license information for your sources so that you can credit them properly.
In Week 5 you will roll up your sleeves to create your mini-MOOC. The MOOC assignment requires you to create original content. In addition to compiling the sources that you have found, you will also create presentations, interactive assignments, and assessments to make your MOOC a unique learning experience.
In Weeks 6-7 you will share your work with the rest of the class. Your feedback buddies will role play being a student in your MOOC so that you can gain insight into the learners’ perspective. Your peers’ feedback will help you improve your MOOC, which you will submit for grading at the end of Week 7.
In Week 8 you will celebrate your creative, hard work!
Steps in Creating a MOOC
1. Identify Topic: Select a topic you care about (e.g., expertise you want to share with the world, skill/ability that you want to develop in yourself). Start using the MOOC Planner.
2. Preliminary Scan of Possible Resources: Browse OER collections, other MOOCS and the web to identify relevant, high quality resources. Keep a log, noting URLs and authors, so that you will be able to cite the videos, readings, and images.
3. Articulate Desired Outcomes: Identify and describe the understandings, skills, and abilities that you want your learners to attain through the MOOC experience
4. Learning Design, Part I – Chunk Content: Map the concepts, skills, and abilities into two clusters (introduction, application). Each cluster will be a module in the MOOC.
5. Learning Design, Part 2 – Plan Exercises and Experiences: Brainstorm, hone, and finalize ideas for the interactive component of your MOOC (e.g. assignments, discussions). Write detailed and clear guidelines for this interactive work, keeping in mind the level of orientation that your learners will need in order to succeed.
Investigate, experiment, evaluate, and practice using LMS tools and technologies that could support these exercises.
6. Secondary Scan – Curate Content: Revisit your preliminary log of resources. Select the best and most relevant ones for your topic and for the desired learning outcomes. Consider the amount of time it will take to read/view these materials so that you don’t overload your students.
7. Build the MOOC: Put it all together in the learning platform. This may sound straightforward, but don’t wait until the last minute to do this! Technology always involves surprises!
Resources for Staging Your Course
The COOL Collection will serve as a resource for content and resources created by others. In addition, you will create your own content, exercises, assignments, and assessments. But where will you put it? Where will it be staged?
In the past there was no easy answer to this question, and students used a range of platforms, as evidenced by the examples below. However, starting in Summer 2020 we received permission from Northeastern Academic Technology to give each of you teacher-level access to a Canvas course shell so you can create your MOOC within it. Canvas has the majority share of the market in learning management systems, so learning how to use it can be a valuable skill.
Your mini-MOOC must be created in an open learning environment that can be accessed freely over the web. Below are links to open platforms and other resources that will help you design and build a wonderful MOOC.
You’re free to use whatever course platform that you want, provided that the people in the Open Learning course can access it. Below are a few options. Canvas guides are located at http://guides.instructure.com/m/4152.
Northeastern’s Center for Advancing Teaching and Learning Through Research also has a self-paced course on developing and teaching courses in Canvas. You can self-enroll by going to https://northeastern.instructure.com/enroll/D39DYM
Finding Images
Flickr provides an advanced option that allows you to search only for images that have Creative Commons licensing. See it at https://www.flickr.com/search/?advanced=1&license=2%2C3%2C4%2C5%2C6%2C9
Pixabay is also a great tool for finding high quality images that have copyright clearance – https://pixabay.com.
Even though these images are free, remember that you need to credit your sources!
Other Interactive Technologies
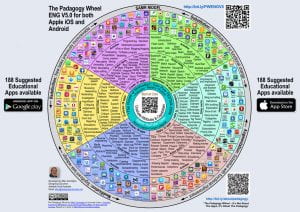 Check out Allan Carrington’s “Padagogy Wheel” that maps technology tools to learning processes and outcomes.
You might also want to check out Janet Hill’s annual top tech tools for learning survey.